Snapping is one of the most important concepts in Doodleback, but if you don’t understand how it works, it can sometimes be frustrating. When Snapping is turned on, the important points (described below) of the Path you’re constructing will automatically snap to other important points on the Paper. For example, take this septagon (7-sided Polygon).

Using Snapping and the Line Segment tool I can quickly create spokes from its center to its vertices.
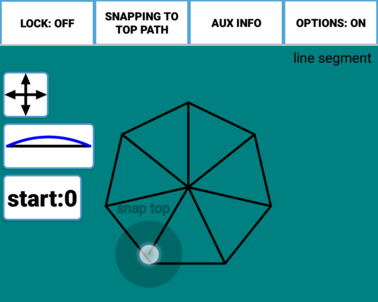
You don’t need to exactly place the ends of the Line Segment. You just need to place your finger near the center to automatically snap to the center and then drag it to a point somewhere near a vertex to automatically snap to the vertex. In this example, the Important Points of the septagon are its center and vertices. The Important Points of the Line Segement are its endpoints and center. Doodleback automatically locks the initial end of the Line Segment to the center of the polygon because that was where I initially placed my finger and it automatically locks the other end of the Line Segment to a vertex of polygon because that was where I lifted my finger.
Important Points
The Important Points of a Path include the points needed to define the Path such as the end points for Line Segments. However, a Path can have many more Important Points than these. The Center of a Path is an Important Point too, for instance. On any Grid (Rectangular, Triangular, Circular), the intersection points of the grid lines are also Important Points. Why? Well, because they’re pretty useful. They’re something that you would probably want to snap to some time. When you construct a Circle, one of the construction options is the number of Important Points to create on the circumference. You might, for example, want to draw the same spoke pattern that I used above, except with a Circle. This circle was created with 16 Important Points on the circumference.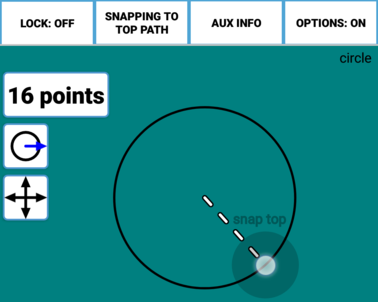
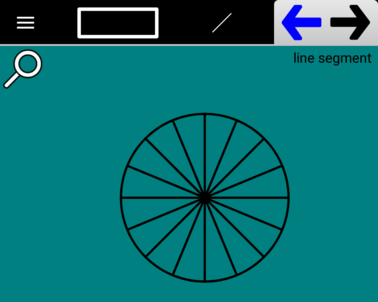
And here we’ve drawn Line Segements from the center to every circumference Important Point.
Snapping Button
The Snapping Button is described in the Header Option Buttons section. It appears at the top of the Paper during construction.
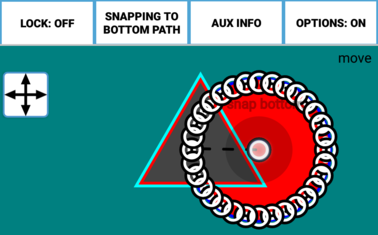
and controls which Path to prioritize (the top-most path,the bottom-most path, the oldest-path, the newest-path) when there is any uncertainty about which Path to snap to. This uncertainty might arise when two path are literally sitting on top of each other. For instance, in this picture, the Triangle is on top of the Circle.

If I want to use the Move tool to grab the bottom Circle by its center, I need to Snap To Bottom Path because both the Circle and the Triangle have the same center.