Paint is much more than color. It has many attributes (Cap Style, Join Style, Fill Style, etc), and up to three layers can be stacked on top of one another to create various effects such as outlines.
Color and Color Sets
In the Paint Tab, the currently selected Color Set is shown. A Color Set is a group of one to three Paints that will be used for the current drawing action. They will be drawn in layers and are listed from top layer to bottom layer on the main page and from left (top layer) to right (bottom layer) in the tab itself. By varying the Stroke Width of the paint, you can create outline effects. The example below is a color set with two Paints. The bottom layer (white) has a stroke width of 19.16 and the top layer (blue) has a stroke width of 8.0.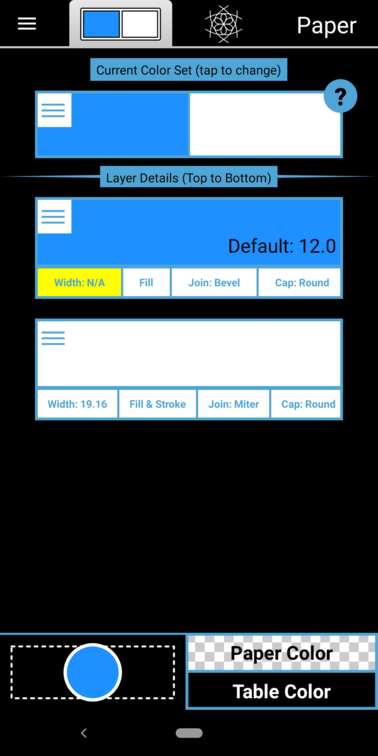
Notice that an example path (a Circle) using the current color set is drawn in the Paper/Table (explained below) preview view at the bottom of the screen.
If we use the Color Set above with the Kaleidoscope tool, the larger stroke width of the bottom layer creates an outline effect. The blue lines have a white border.

Color Selection
To actually select a color for a layer, simply tap the rectangular layer card. This will bring up the paint selection screen. The screen has four tabs. The first one is for color selection. You can select one of the predefined colors from the Palette tab or a custom color from the Custom tab. Custom colors are added using the New tab. See below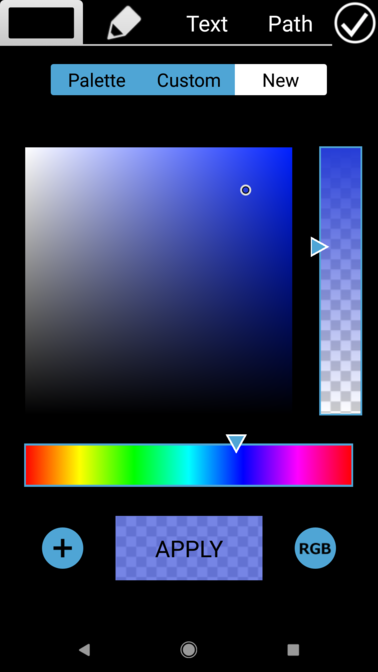
The APPLY button shows the current color. When you’ve adjust the color to your liking, you can press the ”+” button to add it as a Custom Color or simply hit APPLY if you want to use it immediately without adding it to the Custom Color list.
Managing Color Sets
All Paint layers exist in Color Sets which can be created, copied, or deleted using the color set Option button. Within a color set, the individual layers can be moved up or down, new layers can be added (up to three layers), or layers can be deleted. You can also move layers by long pressing and dragging them.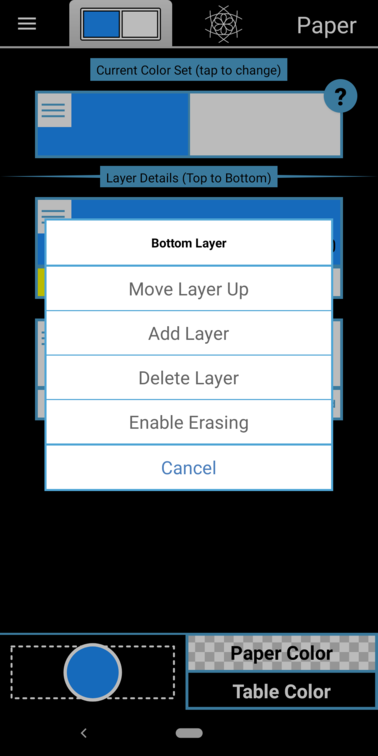
Erasing can be enable or disabled on a layer-by-layer basis, or it can be enable for all layers at once. Erasing is explained in the next article.
To change the currently selected Color Set, tap the rectangular Color Set card at the top of the page. You will be presented with the current list of available Color Sets. You an rearrange this set by long pressing and dragging the sets. This might be useful if you want to place the more frequently used Color Sets at the top of the list.

To copy, delete, or name a color set press the Options Button on the rectangular Color Set card at the top of the page. You can also enable Erasing (explained in the next article) for the entire set or create a new default Color Set.
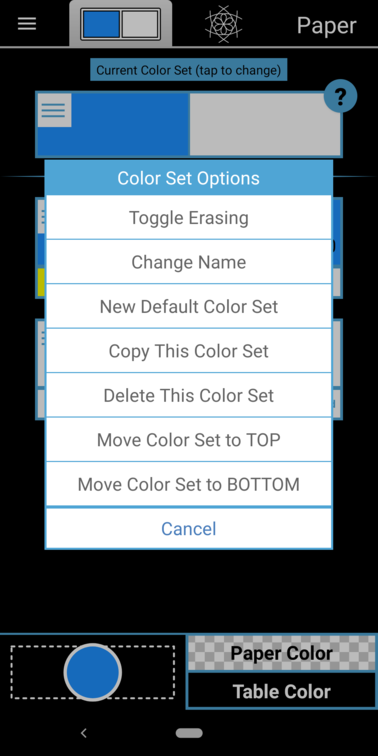
To help you keep track of Color Sets, they can be named. Tap the Options button of the Color Set to access the Change Name action.
The bottom of the screen shows the current Paper and Table colors and a preview on the left of the Paper overlayed on the Table. On top of the Paper is drawn an example path (a Circle) using the current Color Set. Basically, the Paper is what you actually draw on and the Table is what the Paper sits on. If the Paper is partially or entirely transparent, the Table color will show through. This is explained in more detail in the Paper and Table article.